
Overview
Learning about weather is an important first step in learning about climate and climate change. You can explore the weather just by going outside and noticing what’s happening in the sky and air around you, but it helps to have some weather instruments. This activity will help students explore the weather by building a wind dial (anemometer) to measure wind speed, and using a pine cone to tell us about humidity.
Introduction
Students build a simple wind dial (anemometer) and explore how pine cones can tell us about humidity in the air.
Grade Level
K-5
Learning Objectives
Students will
- build fine motor skills by building a weather instrument
- test a weather instrument
- learn about an amazing plant adaptation to weather
Lesson Format
This activity is done indoors to start. It’s ideal to go outside to use the wind dials once the students have made them, but the instruments could be tested indoors with a fan.
Time Required
30-45 minutes of active work (shorter for older students.) The pine cone activity requires some time for a pine cone to take in water or to dry; this could be throughout a day or overnight.
One could break up this activity into two separate ones: the wind dial and the pine cone humidity detector.
Credits & Contact Info
Dr. Ingrid Zabel
Paleontological Research Institution, 1259 Trumansburg Rd., Ithaca NY 14850
zabel@priweb.org
Instructions & Materials
Materials for pine cone humidity detector
For each student or group:
- Dry pine cone
- Water
- A glass or cup
Materials for wind dial
For each student to make their own wind dial:
- Four small paper cups (bathroom cups)
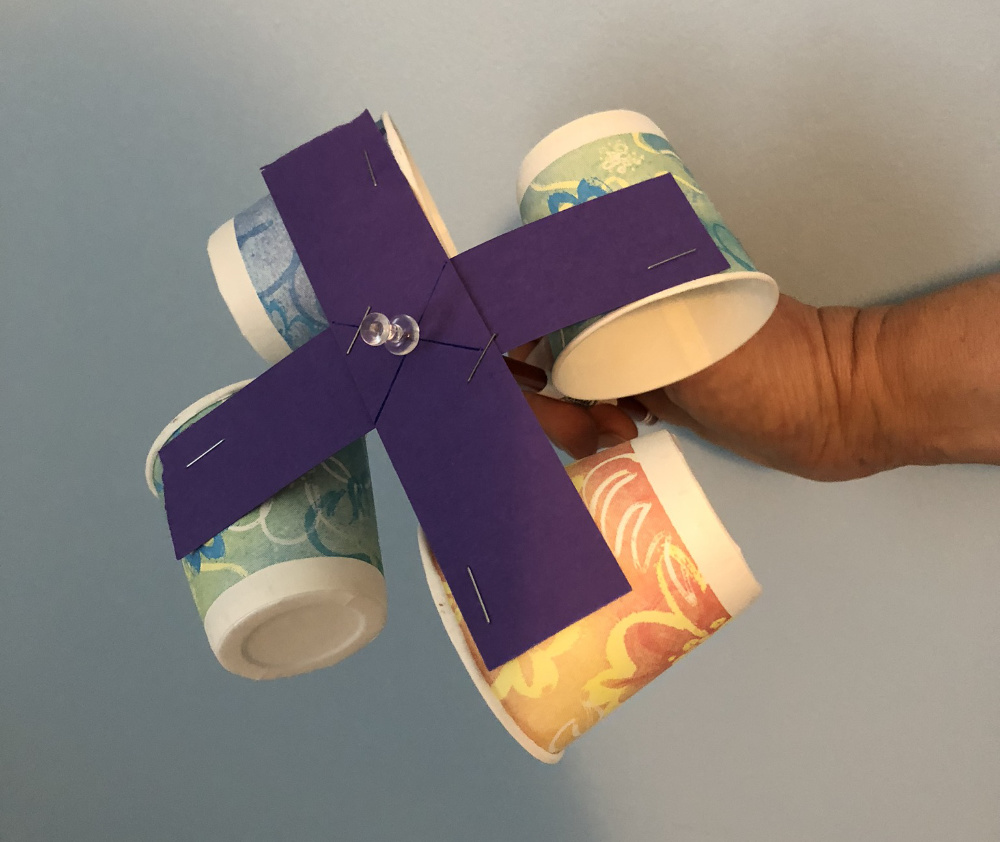
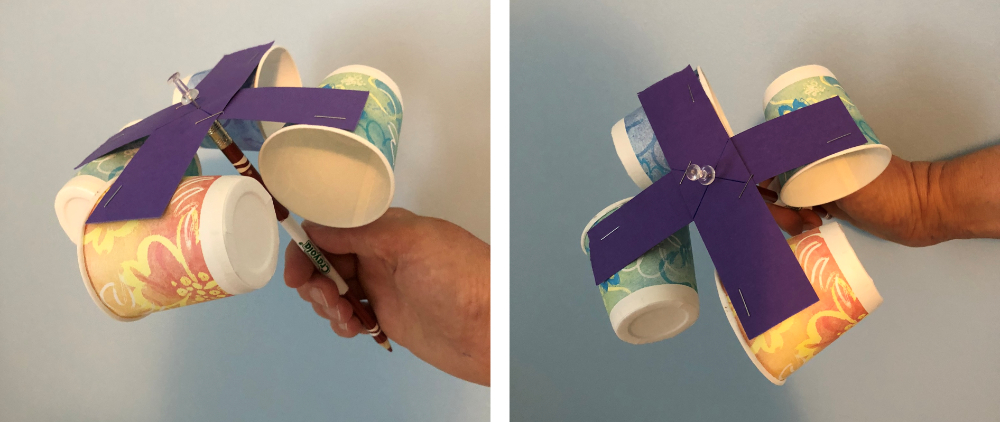
- Two strips of stiff paper (e.g., card stock), stapled together in the center to make the shape of a plus sign (+). Size of each strip: approx. 1 inch x 5.5 inch. See photo.
- NOTE: when stapling the strips together, leave room to insert a push pin in the center (see photo).
- Stapler
- Push pin
- Pencil with eraser
- Optional: fan for testing the wind dial
Instructions for Pine Cone Humidity Detector
See Background & Extensions section for explanations of humidity and why pine cones behave the way they do.
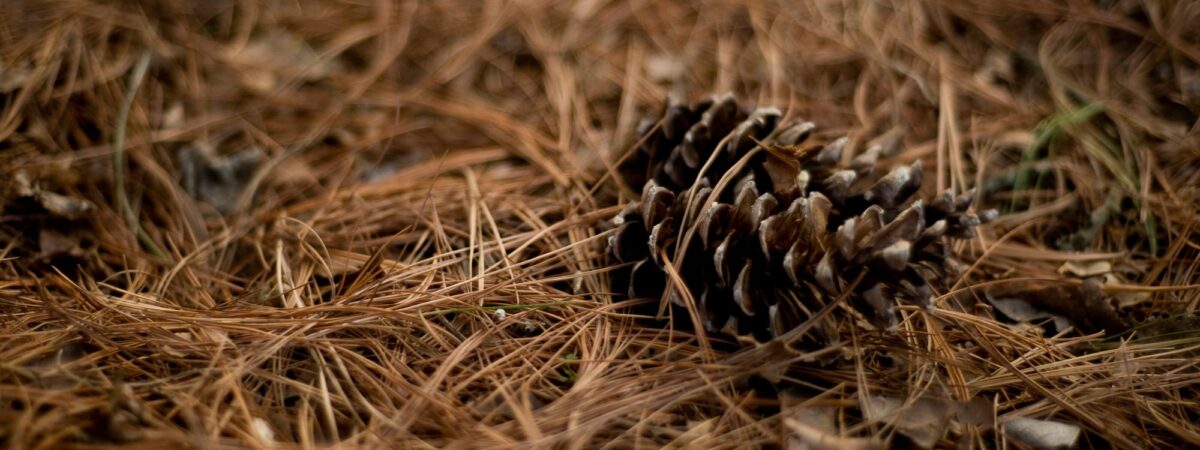
- Give each child a dry pine cone (or go outside and have your students find them on the ground, if your location has pine trees). Ask students to look at their pine cones. Are the scales open? Note the size and shape of the pine cone.
- Now wet the pine cone, either by putting it in a glass of water, or simply by letting water from a faucet run over it. Alternatively, you could put your pine cone outside if you think it's going to rain and if you have a safe place to put the cones where they won't be disturbed.
- Let the pine cone sit, either in the glass of water or on a surface. Check on the pine cone every 15 minutes or so, for about an hour. What is happening?
- After an hour, if the pine cone is still in a glass of water take it out and lay it on a surface. You could put it on a piece of paper and trace its outline, so you have a record of its size and shape. Now let it sit for a long time – maybe 24 hours – and check on it from time to time. Has it changed from when it was wet?
Discussion questions
- After the pine cone has dried, what do you think would happen if you wet it again? Try it!
- If you are outside and see a pine cone on the ground, notice if the scales are open or closed, and think about the weather. Has the air been dry or humid? Is the pine cone’s shape what you would expect, based on what you learned in the experiment?
- Does the same thing happen with cones from other types of evergreen trees, not just pines? If you’re able to find some different types of cones on the ground, you could test this.
Instructions for Wind Dial
- Staple the cups to the end of the stiff paper strips, making sure the cups all face the same direction.
- Push the push pin through the center of the paper “plus sign,” and into the pencil eraser.
- Blow on the paper cups to make sure they spin freely. If they don’t, try wiggling or loosening the push pin a bit.
- Use a pen or marker to color the outside of one of the cups, to make it different from the others. You might use this when the cups are spinning, to count how many times they spin in a full circle.
How to use your wind dial:
Take your wind dial outside on a windy day, and hold it up. You might notice that it spins faster and slower at different times. This happens when the wind blows faster and slower, because it’s the wind that is making the cups move.
See Background & Extensions section for information about wind and instructions for making quantitative measurements of wind speed with your wind dial.
Discussion questions
- Think about the direction of wind in your area. Does wind generally come from the same direction? Why or why not?
- Could buildings or trees slow down or block the wind? How could you test this with your wind dial?
Teaching Tip
The project for building your own wind dial has detailed instructions that a younger child might need help following. Younger children may also need assistance because building the wind dial requires some dexterity to assemble small items, as well as a push pin that is sharp.
Background & Extensions
Humidity and Pine Cones
The air around us contains tiny bits of water in it. These are water molecules, and they’re so small that we can’t see them with our eyes. They move around in the air, and when there are lots of water molecules in the air we say that the air contains “water vapor.”
People use the word “humidity” to describe the amount of water vapor in the air. A day with high humidity is a day when the air contains a lot of water vapor. On a hot, humid day in the summer, the air can feel heavy, almost sticky. We might sweat on a hot day, and sweating is a natural way that our bodies cool themselves, but on humid days our sweating doesn’t help us as much and we feel hotter than on less humid days.
It turns out that pine cones can sense humidity, too, but in a very different way than people do. Pine cones contain the seeds of the pine tree on which they grew, much like apples and peaches contain seeds for their trees. Pine seeds are spread by the wind, so they must be as light as possible. If the seeds get wet, they are temporarily heavier because of the water that is on them, and they won’t travel as well in the wind. Pine cones have evolved in a way so that they have a mechanism to keep the seeds dry. Pine cones only open their scales to spread the seeds when the air is not very humid, and they close their scales when the humidity is high, to protect the seeds and keep them dry.
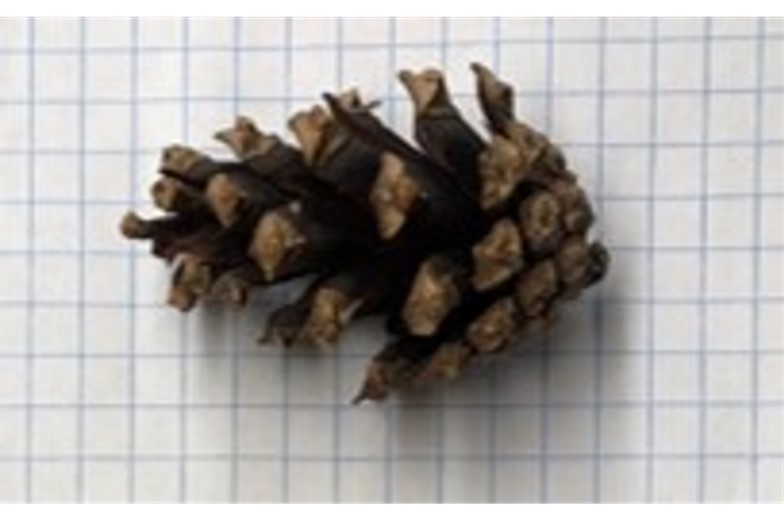
These pictures show a pine cone that had just been brought inside on a humid day, after a rain, and the same pine cone the next day, after being inside in an air-conditioned house, with dry air.
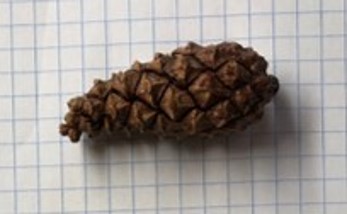
Wet pine cone
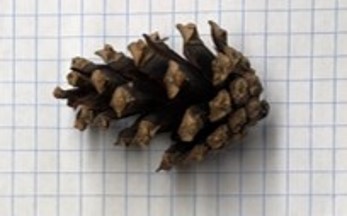
The same pine cone 30 hours later, having been in dry air.
Pine cones you find on the ground are not alive, and they don’t sense humidity the way that people do. Instead, scientists have found that pine cone scales are made out of two different parts that react differently to water, and this creates the opening and closing behavior that we see.
Wind
Air is invisible to us, so you might think it’s just empty space. But we know the air must contain something, because when air moves, we can feel it on our skin and we can see it doing things, like pushing the leaves on the trees and blowing our hair. This movement of air outdoors is called wind, and the air that makes up the wind contains tiny particles called molecules. Many of those molecules are a type called oxygen, and we need those to breathe.
The wind can also carry things much bigger than molecules, like dust, pollen from plants, and insects. Wind brings the weather to us, and then carries it away to someone else’s community. The stronger the wind, the faster that weather can travel.
Local winds come about because of convection: circulation of air as warmer air expands and moves up and cooler air contracts and moves down. For example, consider a beach on a sunny day. The land warms up faster than the water does because water has a very high heat capacity – it takes a lot more energy to heat up water than to heat up land. Because the land is warm, the air above it warms and rises. As it moves out over the cooler water, the air cools, becomes denser, and starts to sink. This sets up a local, circulating air pattern so that beachgoers will feel a breeze coming in from the sea during the day.

Calculating wind speed with your wind dial
You can try to calculate the average wind speed. If you hold your wind dial out in the wind for a minute, the wind might vary from faster to slower, but the average wind speed gives you an idea of the speed in between the fastest and slowest winds.
Here’s how you do it:
- Count the number of times the dial spins in one minute. You can do this by watching the cup that you marked. Each time this cup makes a full circle, that counts as one spin. You’ll also need to be able to time one minute; have someone else keep track of time.
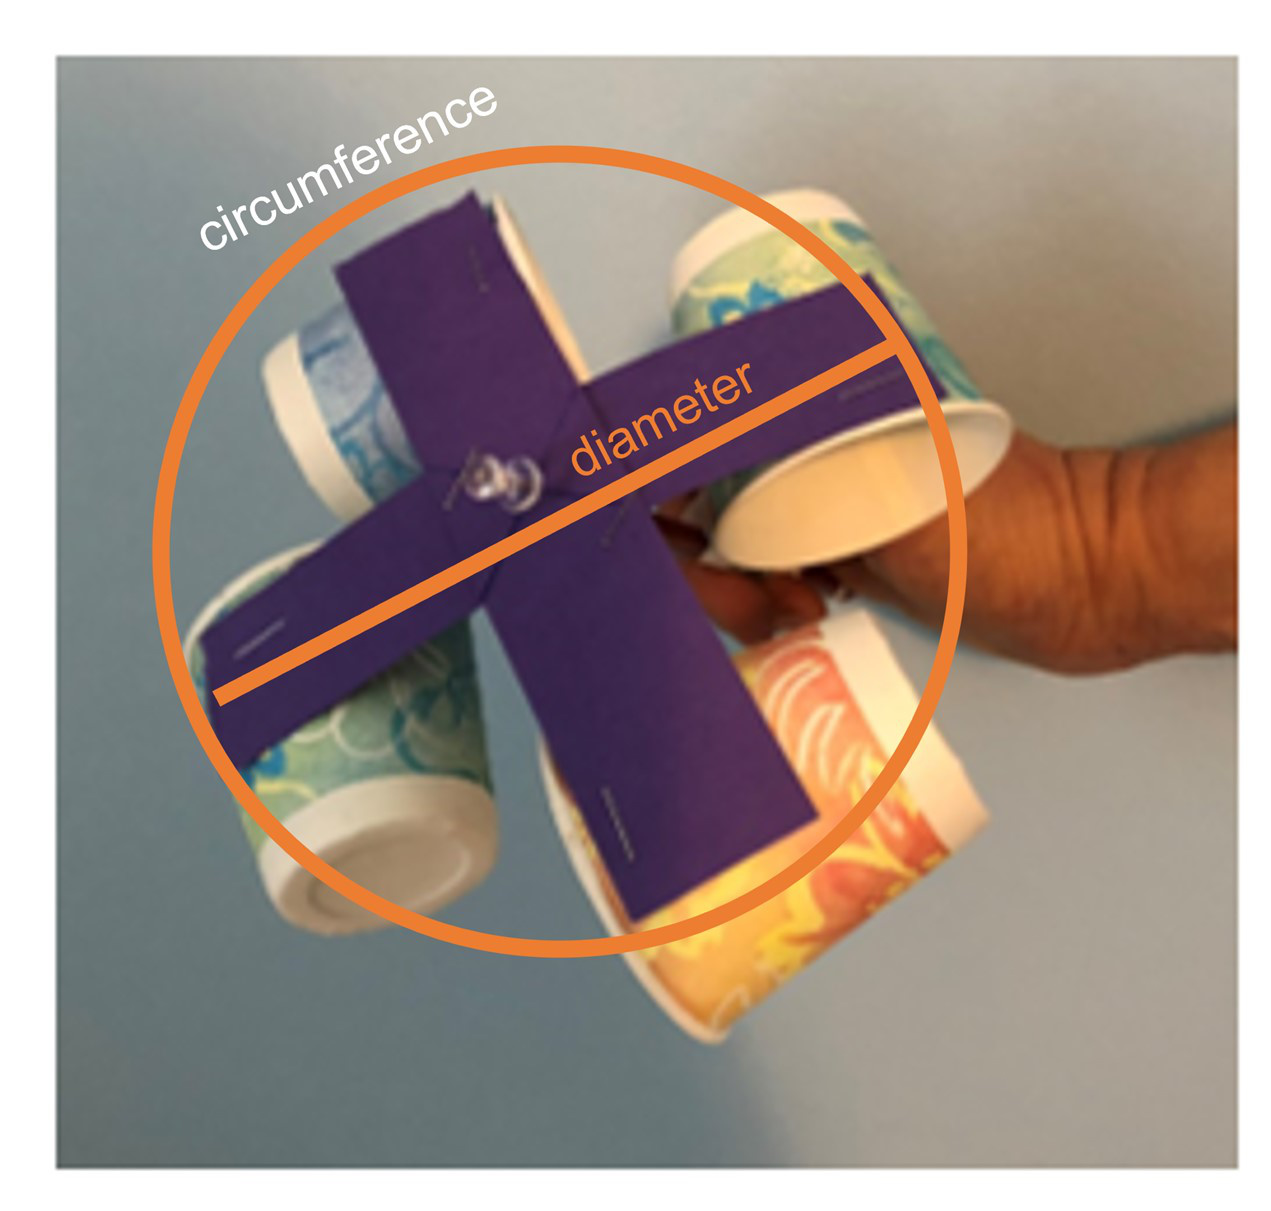
- Now you need to know the distance the cup traveled around as it moved in a circle. This is the circumference of the circle made by the cups as they twirl around. The diameter of the circle is the length of the paper strip (see photo below).
-
Here’s a formula for the wind speed:
Wind speed = (number of spins per minute) x (circumference)
NOTE: this speed is in inches per minute. To convert this to miles per hour (a more common unit), multiply your answer by 0.00095.
As an example, suppose the paper strips are 5.5 inches long. Then diameter = 5.5 inches.
circumference = diameter x pi
circumference = (5.5 inches) x 3.14
circumference = 17.3 inches.