

Overview
If you are outside in a strong wind, you can feel how powerful it is. For hundreds of years, people have used the power of the wind to run machines, to do things like pump water and grind wheat into flour. Now we use wind turbines to make electricity from the wind! This is a great way to make electricity because it doesn’t involve burning oil, natural gas, or coal. Using these fuels (called fossil fuels) releases gases into the air that are heating up our planet, but wind turbines don’t pollute in this way.
Introduction
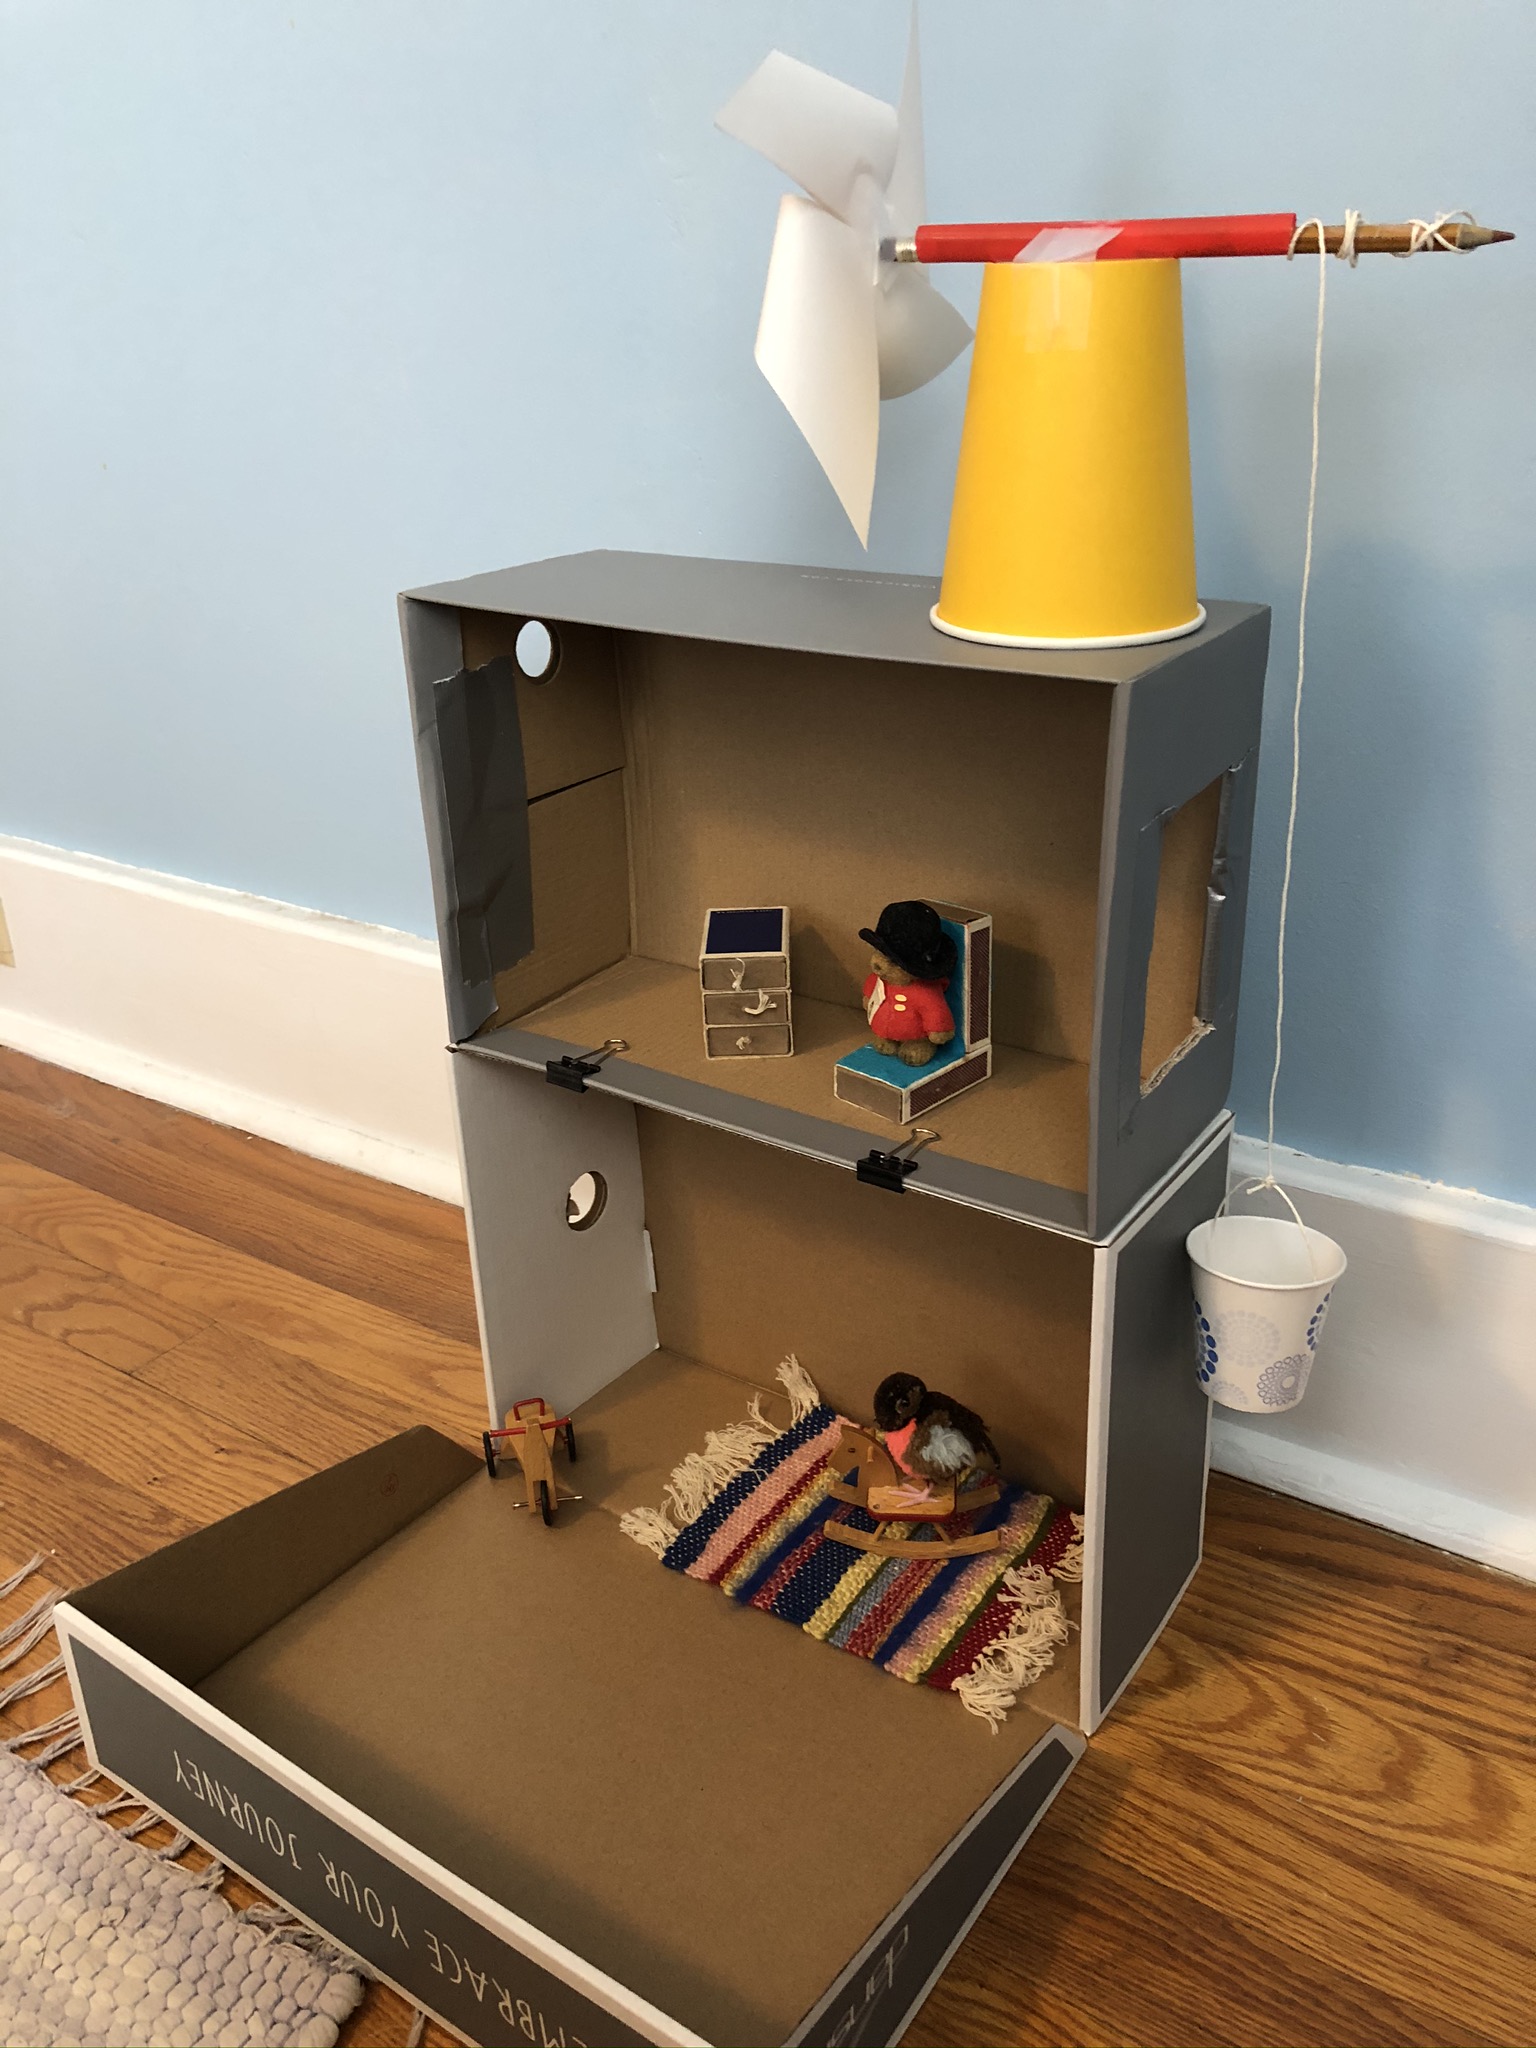
This activity involves building a tiny, wind-powered elevator: a small cup lifted by a pinwheel. You could use the elevator to lift things from the ground floor to the second floor of a house you make from shoe boxes.
Grade Level
K-5
Learning Objectives
Students will explore converting rotational kinetic energy to translational kinetic energy. This can be the starting point for discussions of converting rotational kinetic energy to electrical energy.
Students will build fine motor skills.
Lesson Format
This activity can be done indoors, and a fan is helpful for testing the machines that students build.
Time Required
30 - 45 minutes; younger students will require more time and assistance to build their devices.
Credits & Contact Info
Dr. Ingrid Zabel
Paleontological Research Institution, 1259 Trumansburg Rd., Ithaca NY 14850
zabel@priweb.org
Instructions & Materials
Materials
- Square piece of paper, about 4 or 5 inches per side
- Tape
- Scissors
- Push pin
- Round pencil with eraser
- Note: hexagonal pencils will not spin as easily as round pencils
- Smoothie straw (wide enough to hold a pencil and allow the pencil to spin freely)
- Tall cup
- Small paper cup
- String
- Optional: fan to generate wind
Instructions
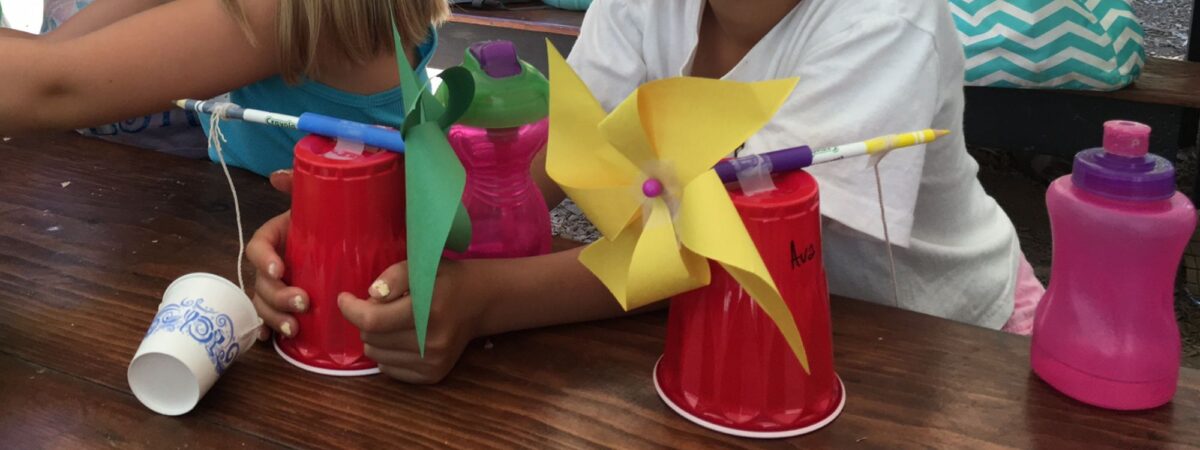
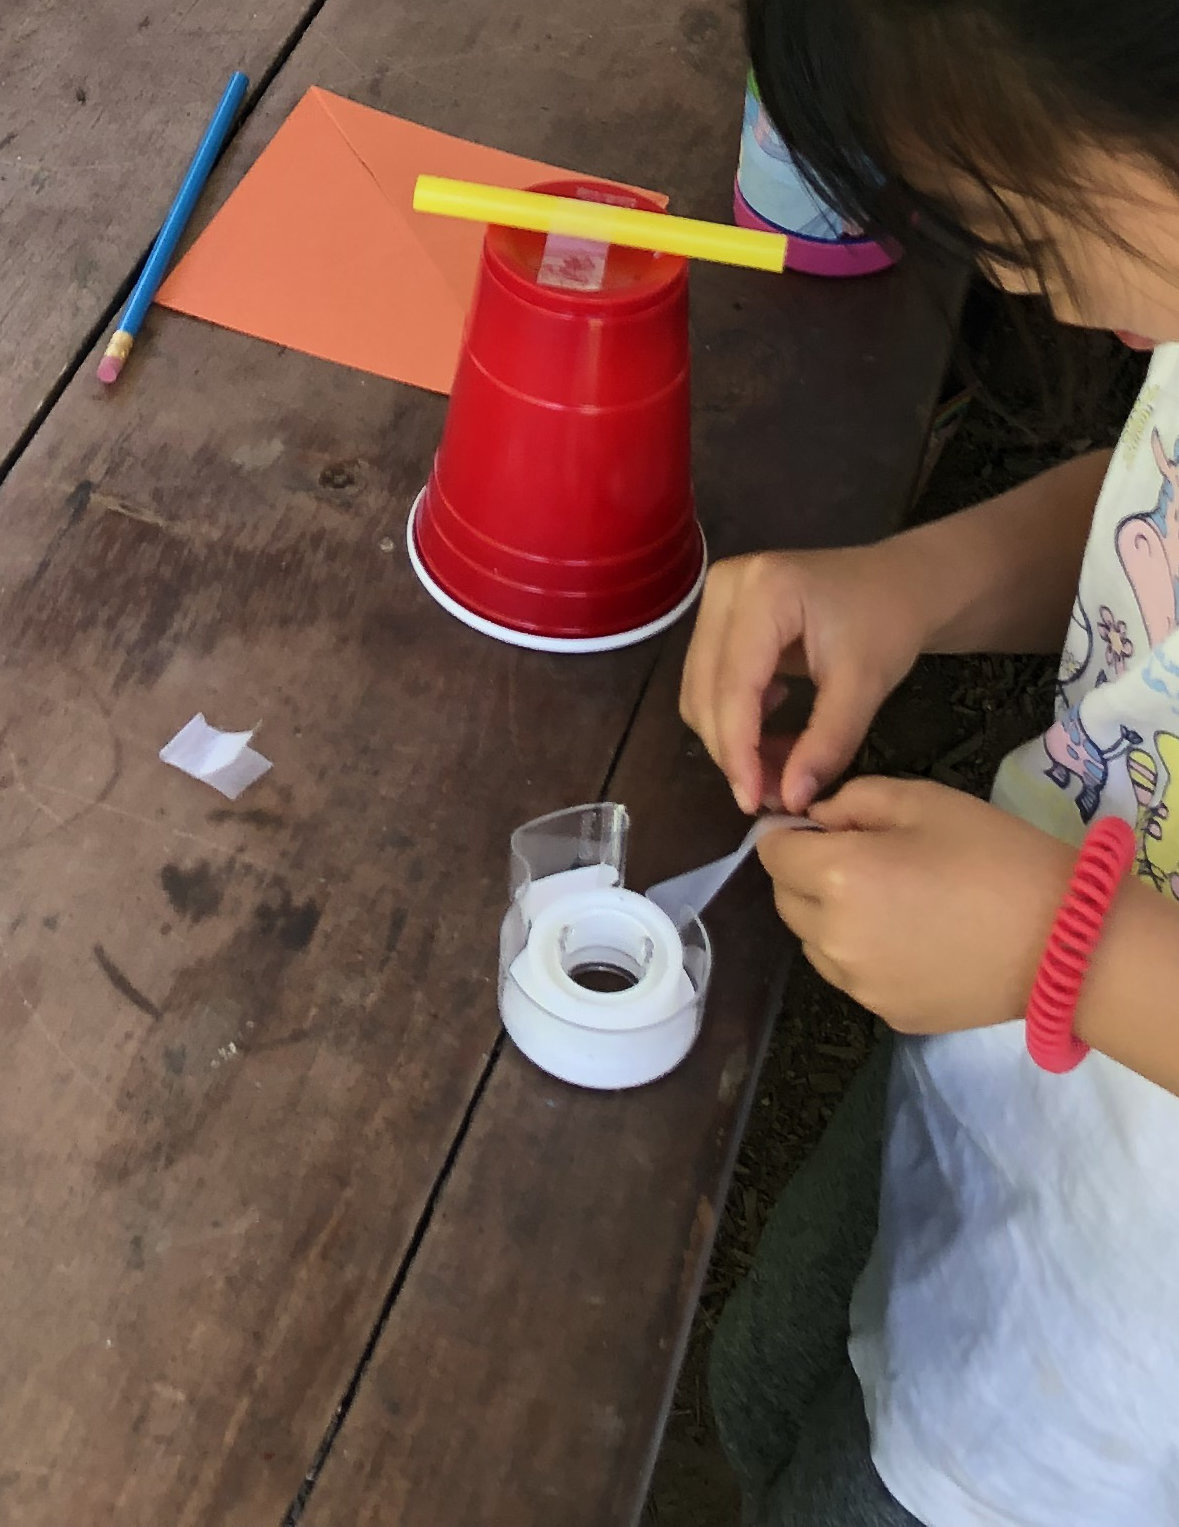
The wind-powered elevator uses a rotating pinwheel attached to a pencil to lift a small paper cup. To make the pinwheel (see figure below), take a square piece of paper, cut in along the diagonals toward the center (but stopping within about 1 cm from the center), fold one corner of each section into the center, and fasten these corners with tape.
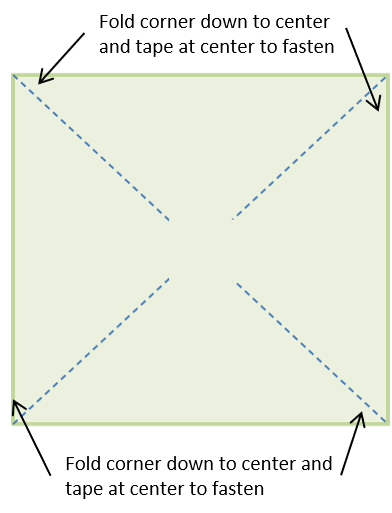
Diagram of paper used to form pinwheel. Cut along the dashed lines toward the center. Stop about 1 cm before you reach the center.
After cutting, fold corners to center.
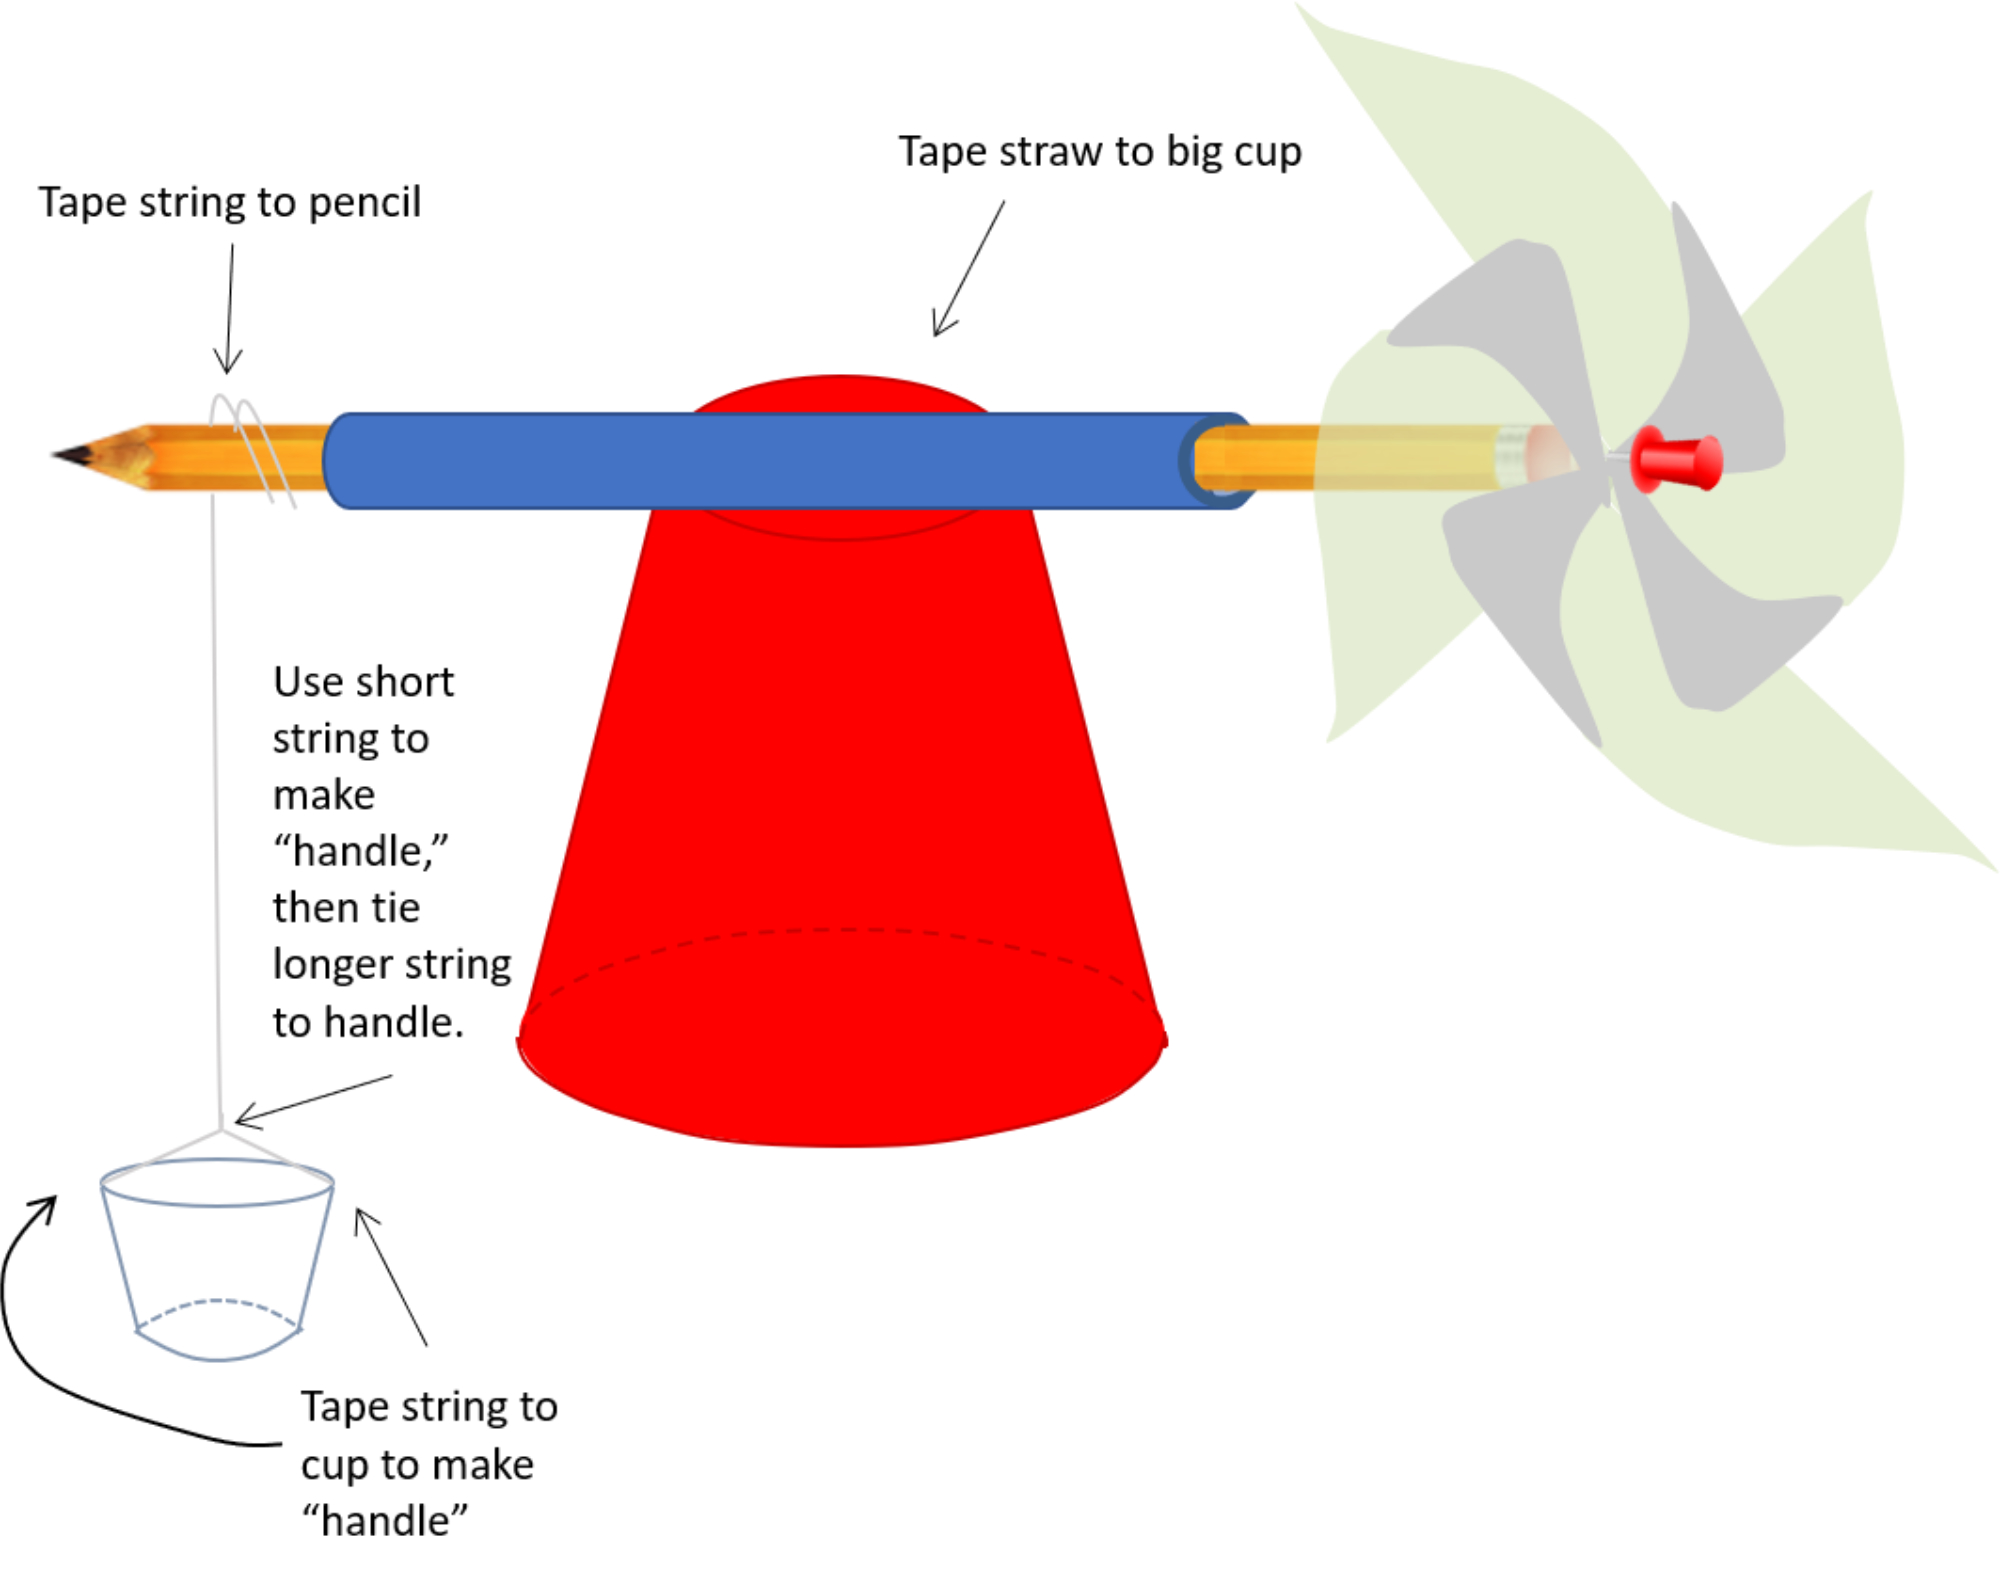
Attach the pinwheel to the top of the pencil eraser with a push pin, making sure that the pinwheel and pencil turn together. You might need to use a small piece of tape to attach the pinwheel to the eraser. Cut the straw in half, or to a length so that the ends of the pencil will stick out from it. Turn the tall cup upside down and tape the cut straw to the cup bottom. Insert the pencil into the straw. The straw holds the pencil and allows it to spin freely.
Attach the ends of a small string to the small cup, forming a handle. Tie a longer string to the middle of the handle. Attach the other end of the long string to the open end of the pencil with tape. See figure below for a picture of the completed machine.
Now test the machine! When air makes the pinwheel turn, the pencil spins and the string will wind up and lift the cup. Students can provide the wind by blowing on the pinwheel. They will need to blow hard! You could also hold the machine in front of a fan if it’s too hard to blow on it.
How-to video:
"Build a wind-powered machine" by Paleontological Research Institution (YouTube)
Discussion Questions
- Was energy of one form converted to another, and if so, how? All the forms of energy in this activity are mechanical, but some are rotational (pinwheel turning) and some are translational (wind moving linearly, cup moving upward).
- For a wind turbine that makes electricity, what type of energy conversion takes place? (Mechanical energy to electrical energy)
Teaching Tips
The project has detailed instructions that a younger child might need help following. It also requires some dexterity to assemble small items, and involves a push pin that is sharp.
Background & Extensions
In developing this activity initially, we had hoped to create an activity appropriate for very young children in which they could build a wind turbine to light up an LED bulb using simple materials commonly found at home. We struggled to do this, finding, for example, that we needed to use neodymium magnets to generate a strong enough magnetic field in the turbine (as opposed to common, refrigerator magnets), but that neodymium magnets could snap together very forcefully and so could cause injuries to the small fingers of a 5- or 6-year old child.
Certainly one can purchase good quality kits for kids to build wind turbines, but this went against our intention of having an activity that used common, household materials. So we settled on an activity that illustrates the power of the wind, but focusing on generating useful mechanical energy rather than electrical energy. In running this program with young children we have tried to draw the parallel that if wind-powered machines can do mechanical work, they can also create electrical energy (realizing, of course, that young children have not yet been exposed to the technical definitions of "work" and "energy").
Extension
Students could build two different "elevators" with different sizes of pinwheels, a smaller and a larger one, and then test how they perform by trying to lift a few pennies in the cups. Which pinwheel spins faster and which one can lift a heavier load?
Make sure you have the same number of pennies in each cup so the comparison is fair. Start with just one or two pennies and then keep running the experiment with heavier loads.